Adobe Illustrator makes it easy to show or hide certain sections of an image without deleting any objects. This allows you to go back and tweak the photo at any point in the creative process. To do this, you'll need to learn how to make a clipping path in Illustrator to have total control over your workflow.
In the world of graphic design and art, sometimes circumstances change at the last minute, and you need a way to modify your work.
Clipping paths are used to isolate objects from their surrounding background. This can be useful if you need to make changes or if you're just looking to create a unique presentation.

Use Code: BLOG10 At Checkout To Save 10% off our Online Adobe Illustrator Courses
Table of Contents
What is a Clipping Path?
A clipping path is a line that can be drawn around an object, separating it from the background.
You may want to use a clipping path to cut out a specific object, like a photo of a flower, and place it on top of another photo.
The line, which is invisible once all is said and done, is called a path because it can be made into more than just a straight line.
Depending on how you want to cut out the object, you can make curved lines, zigzags, or even a maze-like shape.
It is another designer's must-know tool in Adobe Illustrator.
Learning how to make a clipping path in Illustrator means that you will learn how to create text with a background, show the image in shapes, and much more.
When you use a clipping path mask, you can only see the under-part object within the clipping path area.
If you have a full-body body picture but only want to show your headshot, you can create a shape (clipping path) on top of the picture to clip only the head part of the picture.
In this tutorial, I will show you how to make a clipping path in Illustrator, along with some useful tips.
Step by step guide on how to make a clipping path in Illustrator
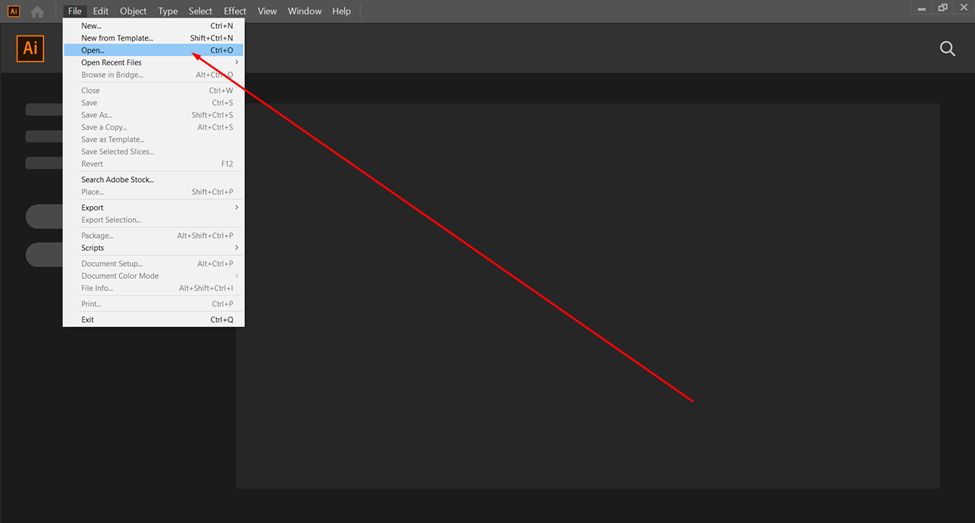
Step 1. Open you document
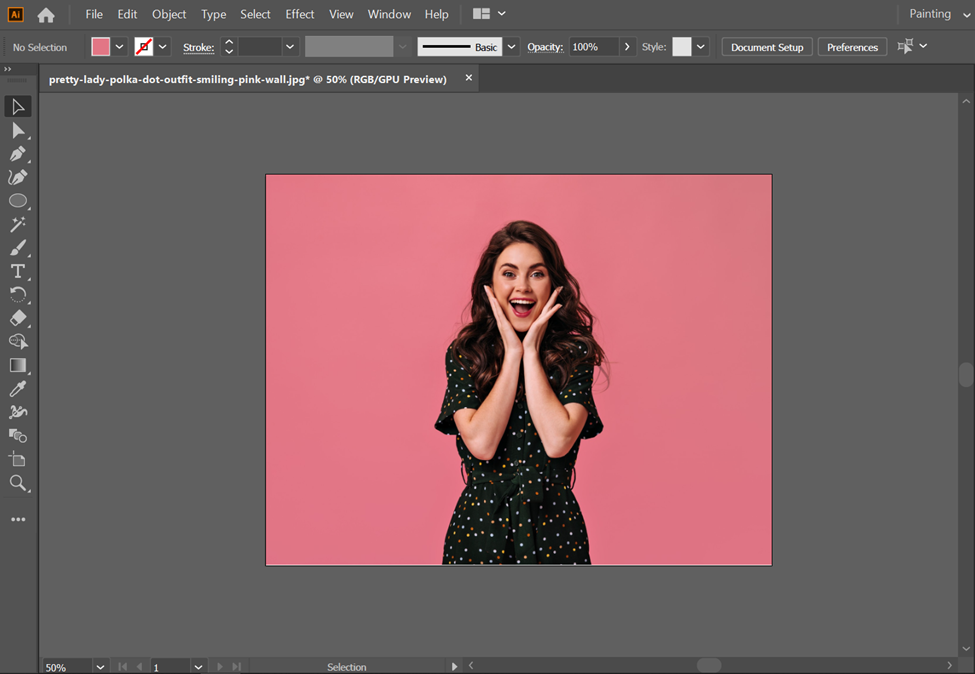
First, open a new Illustrator document; in this case, I have chosen a picture.
Select your preferred image
There are different ways to make a clipping mask.
Keep in mind that the clipping path must be on top of the object you wish to clip in all methods.
In this case, I want to show only the headshot of this image.
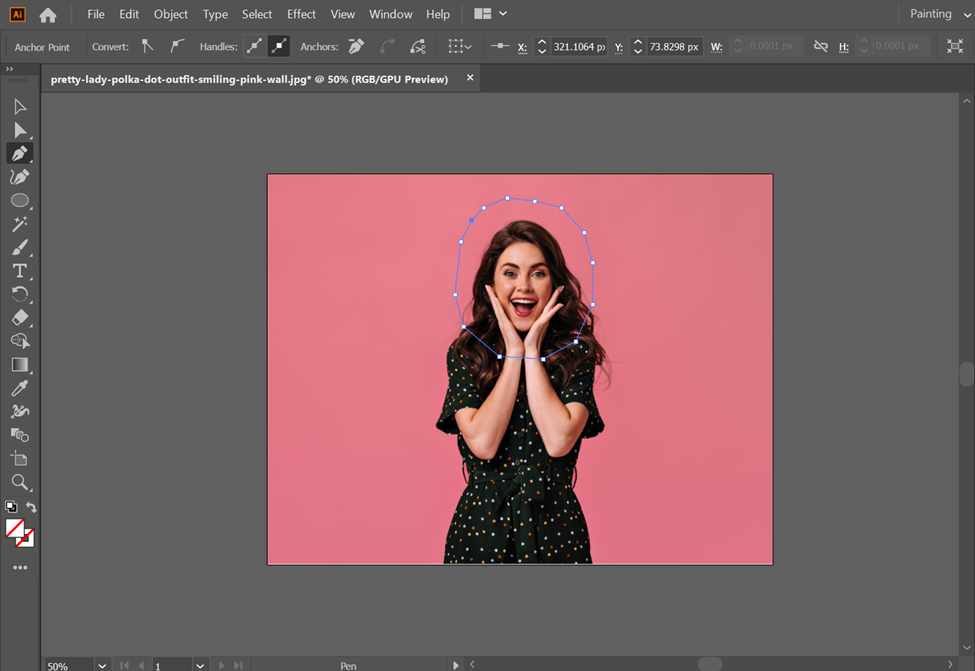
Step 2: Create a clipping path
You can use the Pen Tool to create this path in your document.
Make sure that the Fill and Stroke options aren't selected. You can do that by unchecking them in the Control Panel.
Step 3: Create the clipping mask
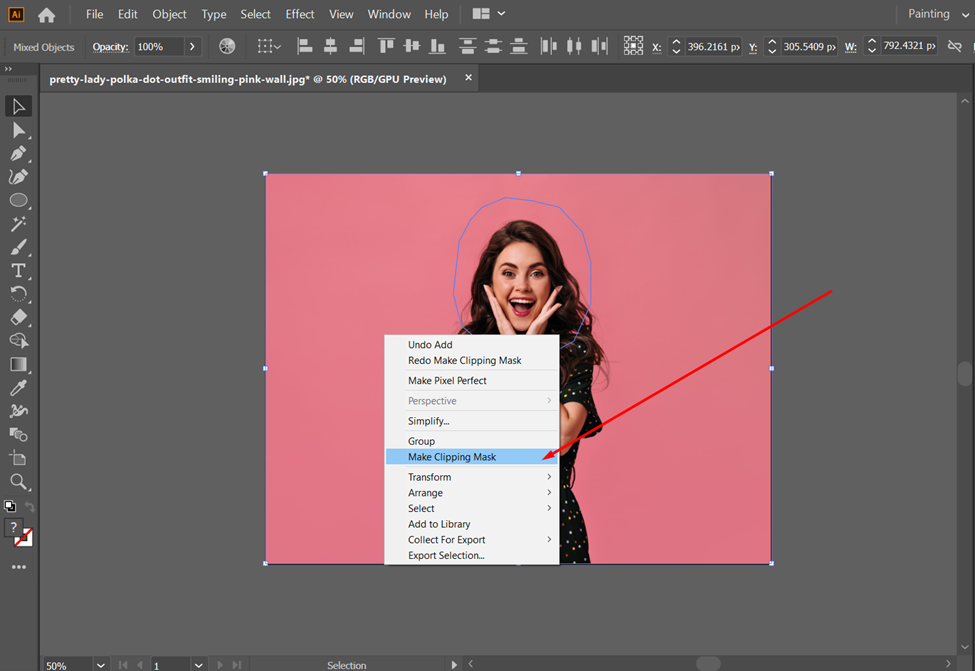
Now select both the clipping path and the photo.
Go to the Object menu (on the top bar) -> Clipping and hit Make.

You also can make a clipping mask using a shortcut.
To do that, simply right-click on the document, then click on Make clipping mask.
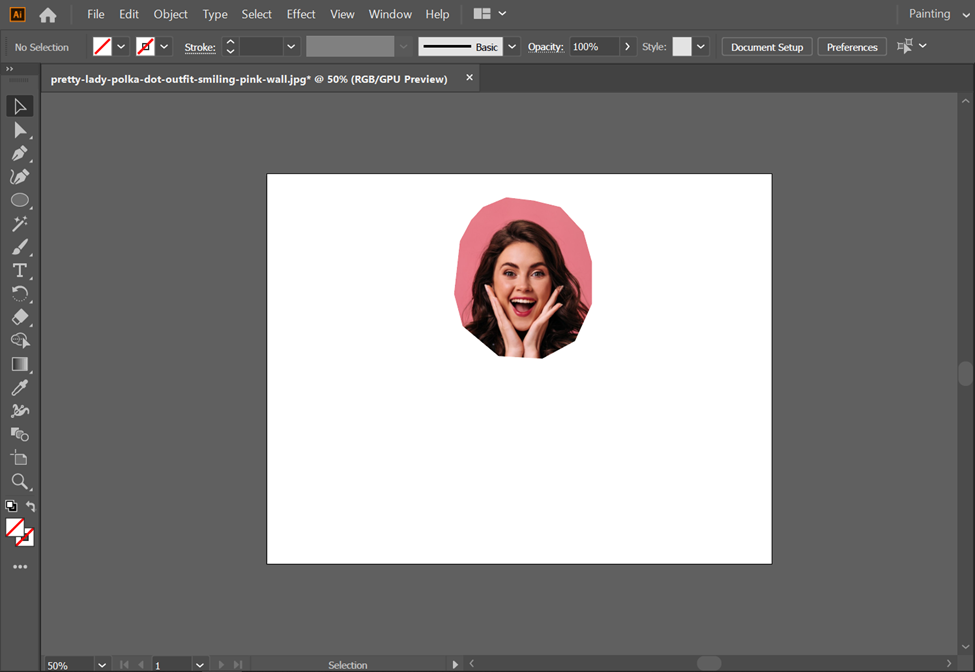
And that's it!
Now you can use this image for different purposes.
- You can use it to create seamless patterns or textures for your designs.
- You can use it for clipping out vector shapes and elements from photos, allowing you to manipulate them further with vectors.
- You can use it to create cutouts of objects from photographs so that you can apply different color schemes or backgrounds on top of them without worrying about matching their colors perfectly.
- You can get rid of unwanted elements behind any object by using the clipping mask feature in Adobe Illustrator.
Closing remarks
You have now learned how to make a clipping path in Illustrator!
Remember that a clipping path is a "mask" that temporarily hides sections of an image.
They are used as part of the process of creating a multi-layer image, also known as an image with a background.
The image can then be easily used in any design since only the specific parts of the image that you want can be seen.
If you know how to use this tool, you won't need anything else to create multi-layered images.
That is why we recommend it to everyone who wants to create quality designs!
Adobe Certifications & Prep Courses
Are you looking to get Adobe Certified?
FMC Training is the leading provider of Adobe certification exams. We’ve helped thousands of people just like you pass their certification exam and land that dream job. Our training material is written and recorded by industry experts who know what it takes to succeed in today's competitive market.
Join our ever-growing Facebook group and ask any Adobe Illustrator questions you might have!
Check out other useful Adobe Illustrator tutorials:
- How to Make a Gradient in Illustrator
- How to Add Artboards in Illustrator
- How to Curve Text in Adobe Illustrator
- What is Adobe Illustrator (Ai)?
- Illustrator Drawings: Making a Pizza
- Drawing live shapes with Adobe Illustrator shape builder tool

_300x300.jpg "Conference-Recordings-(General)_300x300")