Table of Contents
- What Can Photoshop Do?
- Learning the basics
- Combining Multiple Images with Layers
- Adobe Photoshop Tools
- Creating a Layer with Adobe Photoshop
- Editing photos: Filters and effects with Adobe Photoshop
- Saving and exporting your work on Adobe Photoshop
- What is the best way to learn Photoshop for beginners?
- Conclusion
What Can Photoshop Do?
Adobe Photoshop is a powerful image editing program used by millions of people across the globe. Adobe Photoshop allows users to create impressive images, graphics, and designs within minutes.
Advanced photo-editing tools allow users to correct, enhance, or just have fun with their digital images by creating compositions and collages. Users even can design captivating layouts for their websites or documents using Photoshop.
Adobe Photoshop is a complex program with many features to learn. However, once you understand the basics, you can start editing your photos and creating beautiful designs in no time.
You can download Photoshop with an Adobe Creative Cloud subscription.
We will start at the beginning and go over the essential tools and a few features of Photoshop.
Learning the basics
There are three major categories in Photoshop 2022: Items, Layers, and Filters. The first thing you should do is open an empty file.
When you open Photoshop, the Homescreen appears. Here, pick any past projects, find any photo with Open on the left side, or begin a new Photoshop document with New File.
After you click on New File, a box will appear where you can name your File.
To do this, go to File> New. When you open a new document, it is automatically set up to the correct dimensions of Photoshop.
It displays all of the tools available for use in Photoshop.
The second panel is the Layers Panel
You can think of layers as transparent pieces of paper. The top Layer will always be on top, and you cannot hide it unless you delete it entirely by going to Layer> Delete Layer or you can also hide layers by clicking on the "eye" icon. Layers do not have to be in a specific order, and you can move the layers around by clicking and dragging.
The third panel is the Channels Panel
We won’t be going over this today, more to come in the near future, but know that it creates selections on your document.
Combining Multiple Images with Layers
Layer groups help organize and give attributes to different layers in a group. Select all of the layers you want in your group (Ctrl+A), and then select Layer> New > Group from Layers. You can name your group with a double click of one of the layers in the group. If you want to merge two layers together, select the layers you want to merge and go to Layer> Merge Down. Choosing layer blend modes in Photoshop is now easier than ever with blend mode live previews.
Layer styles add effects to your layers. These include borders, drop shadows, and more.
Adobe Photoshop Tools
The Move Tool
This is used for moving the selected layer or image. Click and move.
The Rectangular and Elliptical Marquee Tools
These tools are used to make selections in rectangular or elliptical shapes.
To use either of these tools, click and drag. Holding the shift key while dragging will make your selection proportional to its original size.
The Lasso Tool
This is used for free-hand selections. Hold the Alt button while clicking and dragging with this tool to give yourself an option to add or subtract to the selection.
Object Selection tool
This Adobe Photoshop tool automatically finds and selects specific objects within an image.
This is for creating custom selections—more on this HERE.
Adobe Photoshop Brushes and The Brush Tool
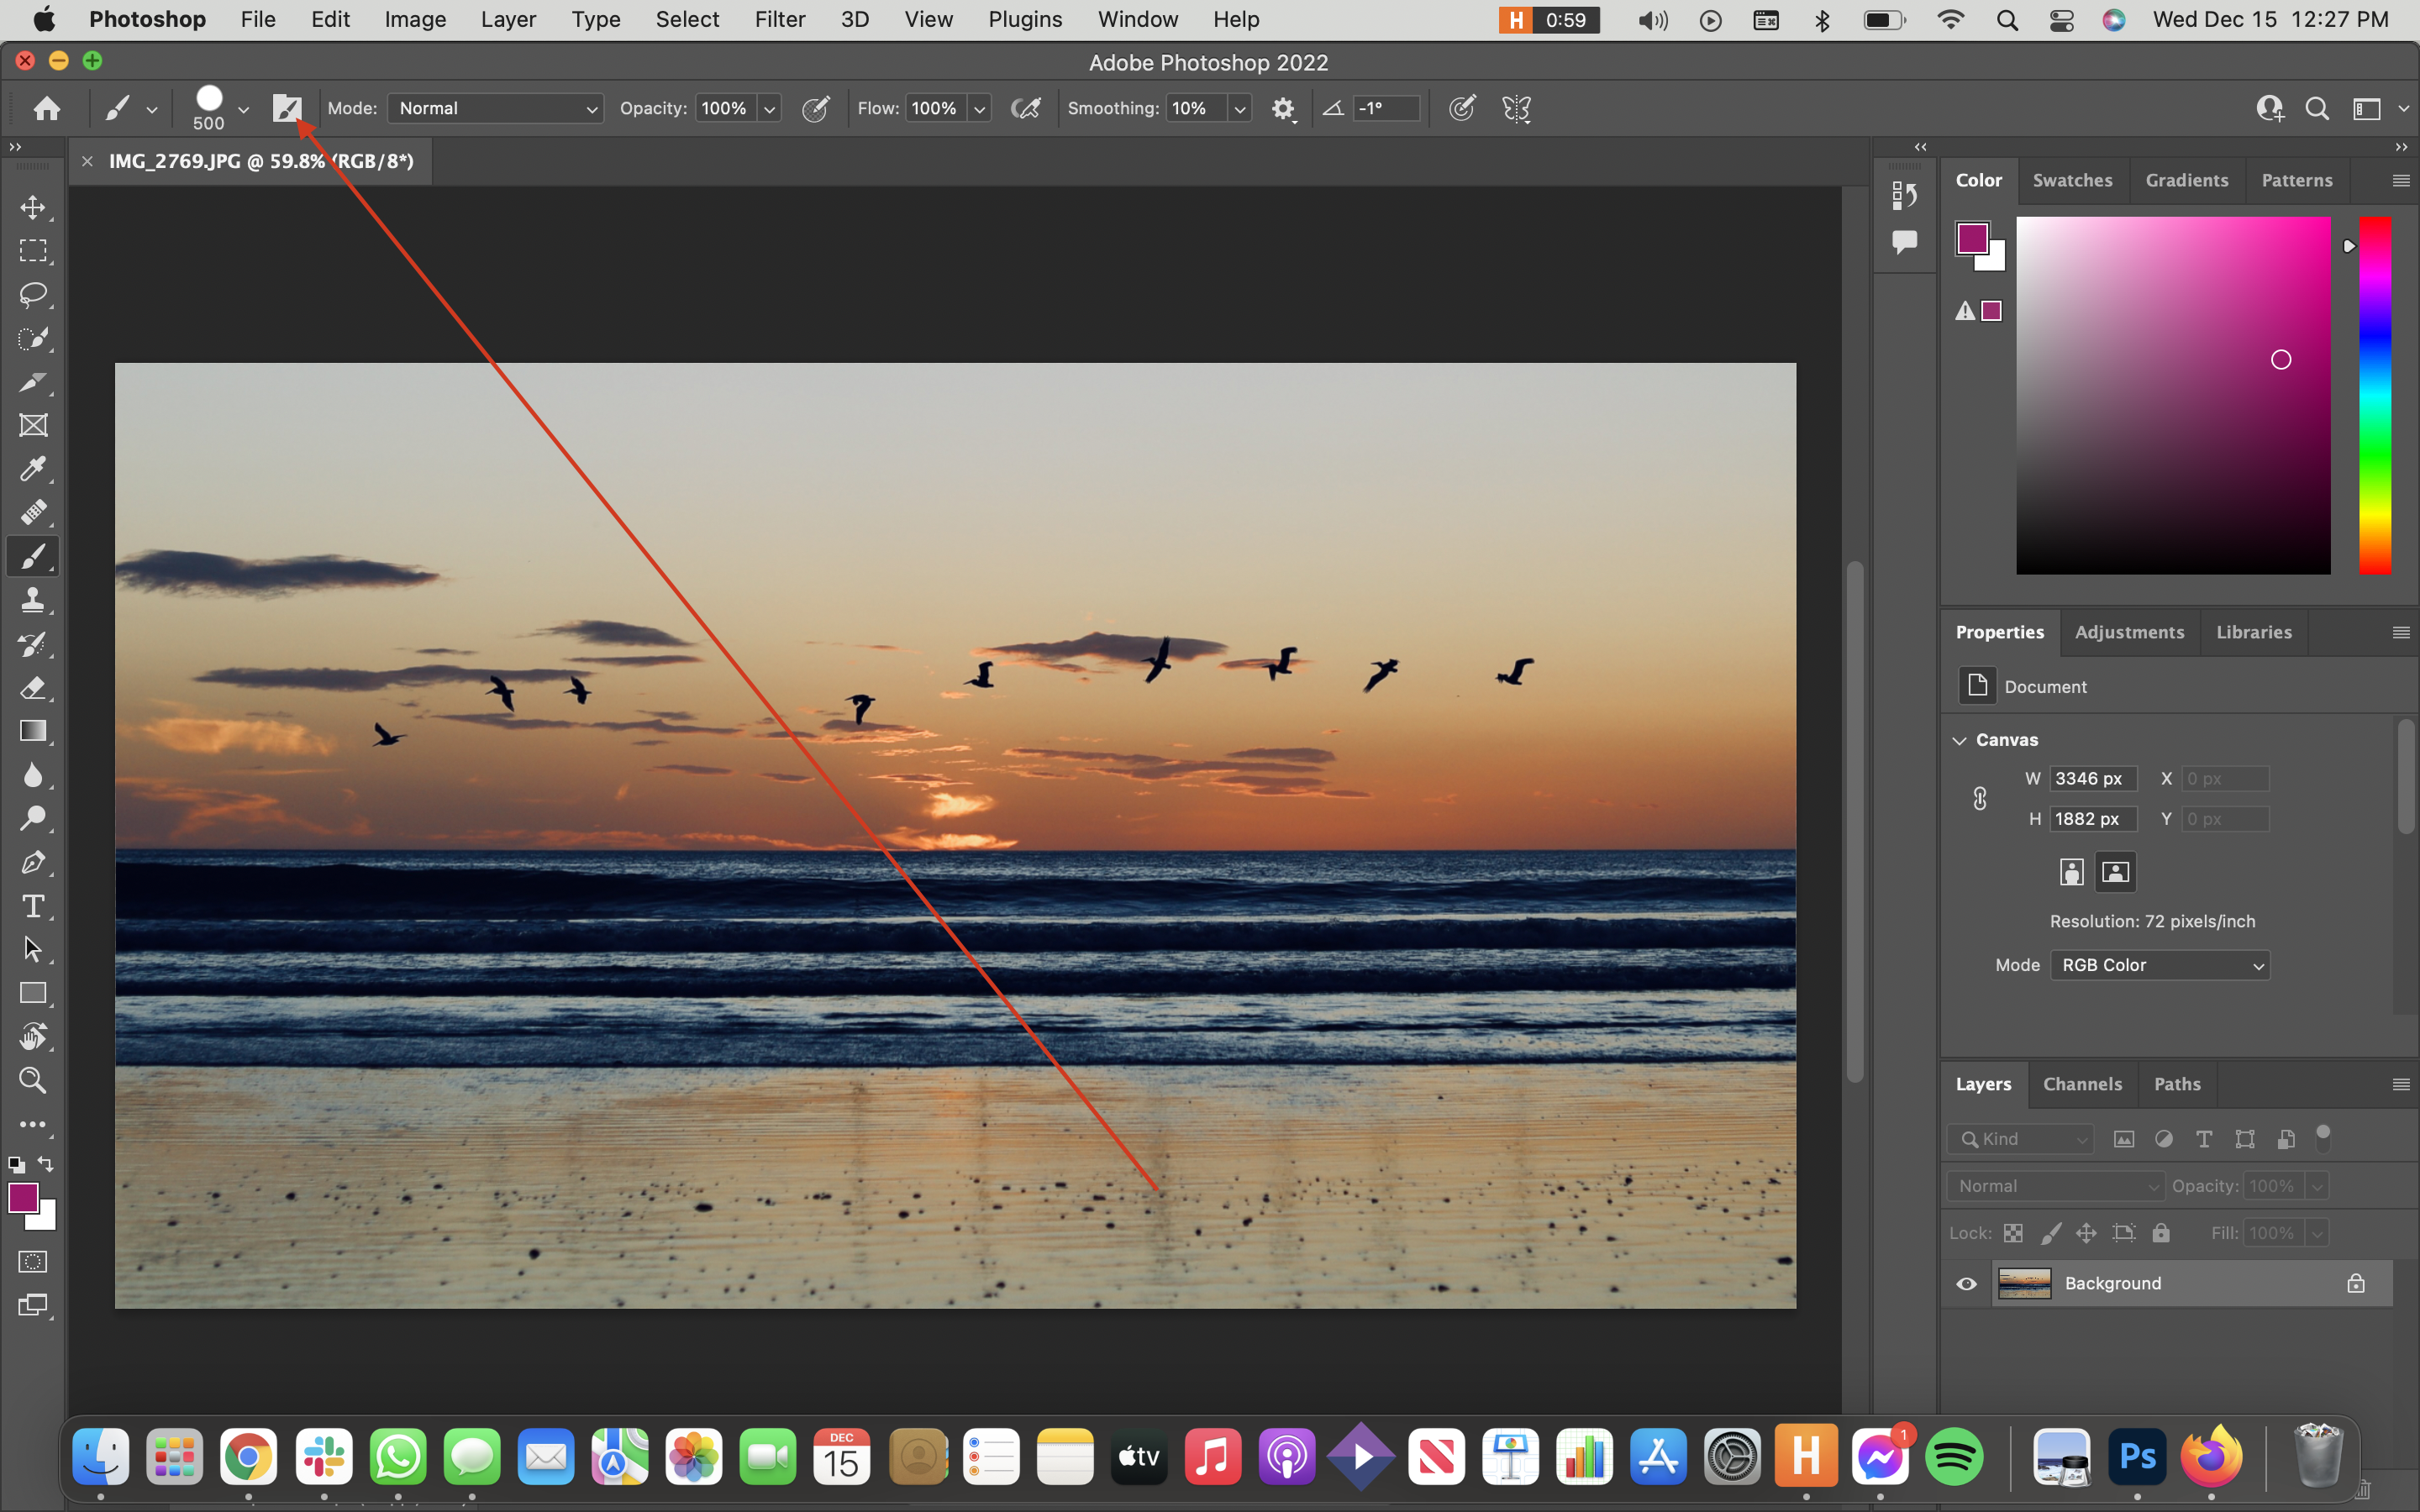
The brush tool is used to paint with different colors and brush sizes. The options for the Brush Tool can be found at the top of your document. You can change the brush size, opacity, hardness, and color of your brush. There are many different types of brushes available in Photoshop. To load a new brush, either go to Window > Brushes, then click Pen Tool, or click on the file icon in the upper left. The Pen Tool can be used to make custom selections and creates anchor points that you can use with the Direct Selection Tool to edit these points.

The Pen Tool
This tool is used for creating custom shapes. You can select this tool at Tools > Pen. To create a shape, you will need first to click once to create the anchor point, then click and drag to create the direction line for that point. To finish the shape, click again on the starting/first anchor point you selected.
The Crop Tool
This is used to crop your image. Click and drag on your image to select the area you want to keep. You can also change the aspect ratio of your cropped image by going to Image > Image Size and changing the values in the Width and Height box. This will affect your overall document size.
The Hand Tool
This tool allows you to navigate your document by dragging it around with your mouse or trackpad. To use this tool, click on the Hand icon in the Tools Panel.
The Zoom Tool
This Photoshop tool is used to zoom in and out of areas of an image. You can select this tool at View > Zoom. Once selected, you can either click and drag your image to zoom in, or use the + and - buttons on the keyboard.
Exploring all the essential Photoshop tools will take some time. There are many more than the ones we briefly discussed above.
Creating a Layer with Adobe Photoshop
Layers allow you separate parts of your image and give you more freedom while working on them. They can also help keep your file size down by only changing certain parts of an image instead of editing the entire thing.
There are a few different ways to create/add layers in Photoshop.
To create a layer, go to Layer > New > Layer.
You can also add new layers by selecting an existing layer and going to Layer > Duplicate Layer. This will create a copy of the layer.

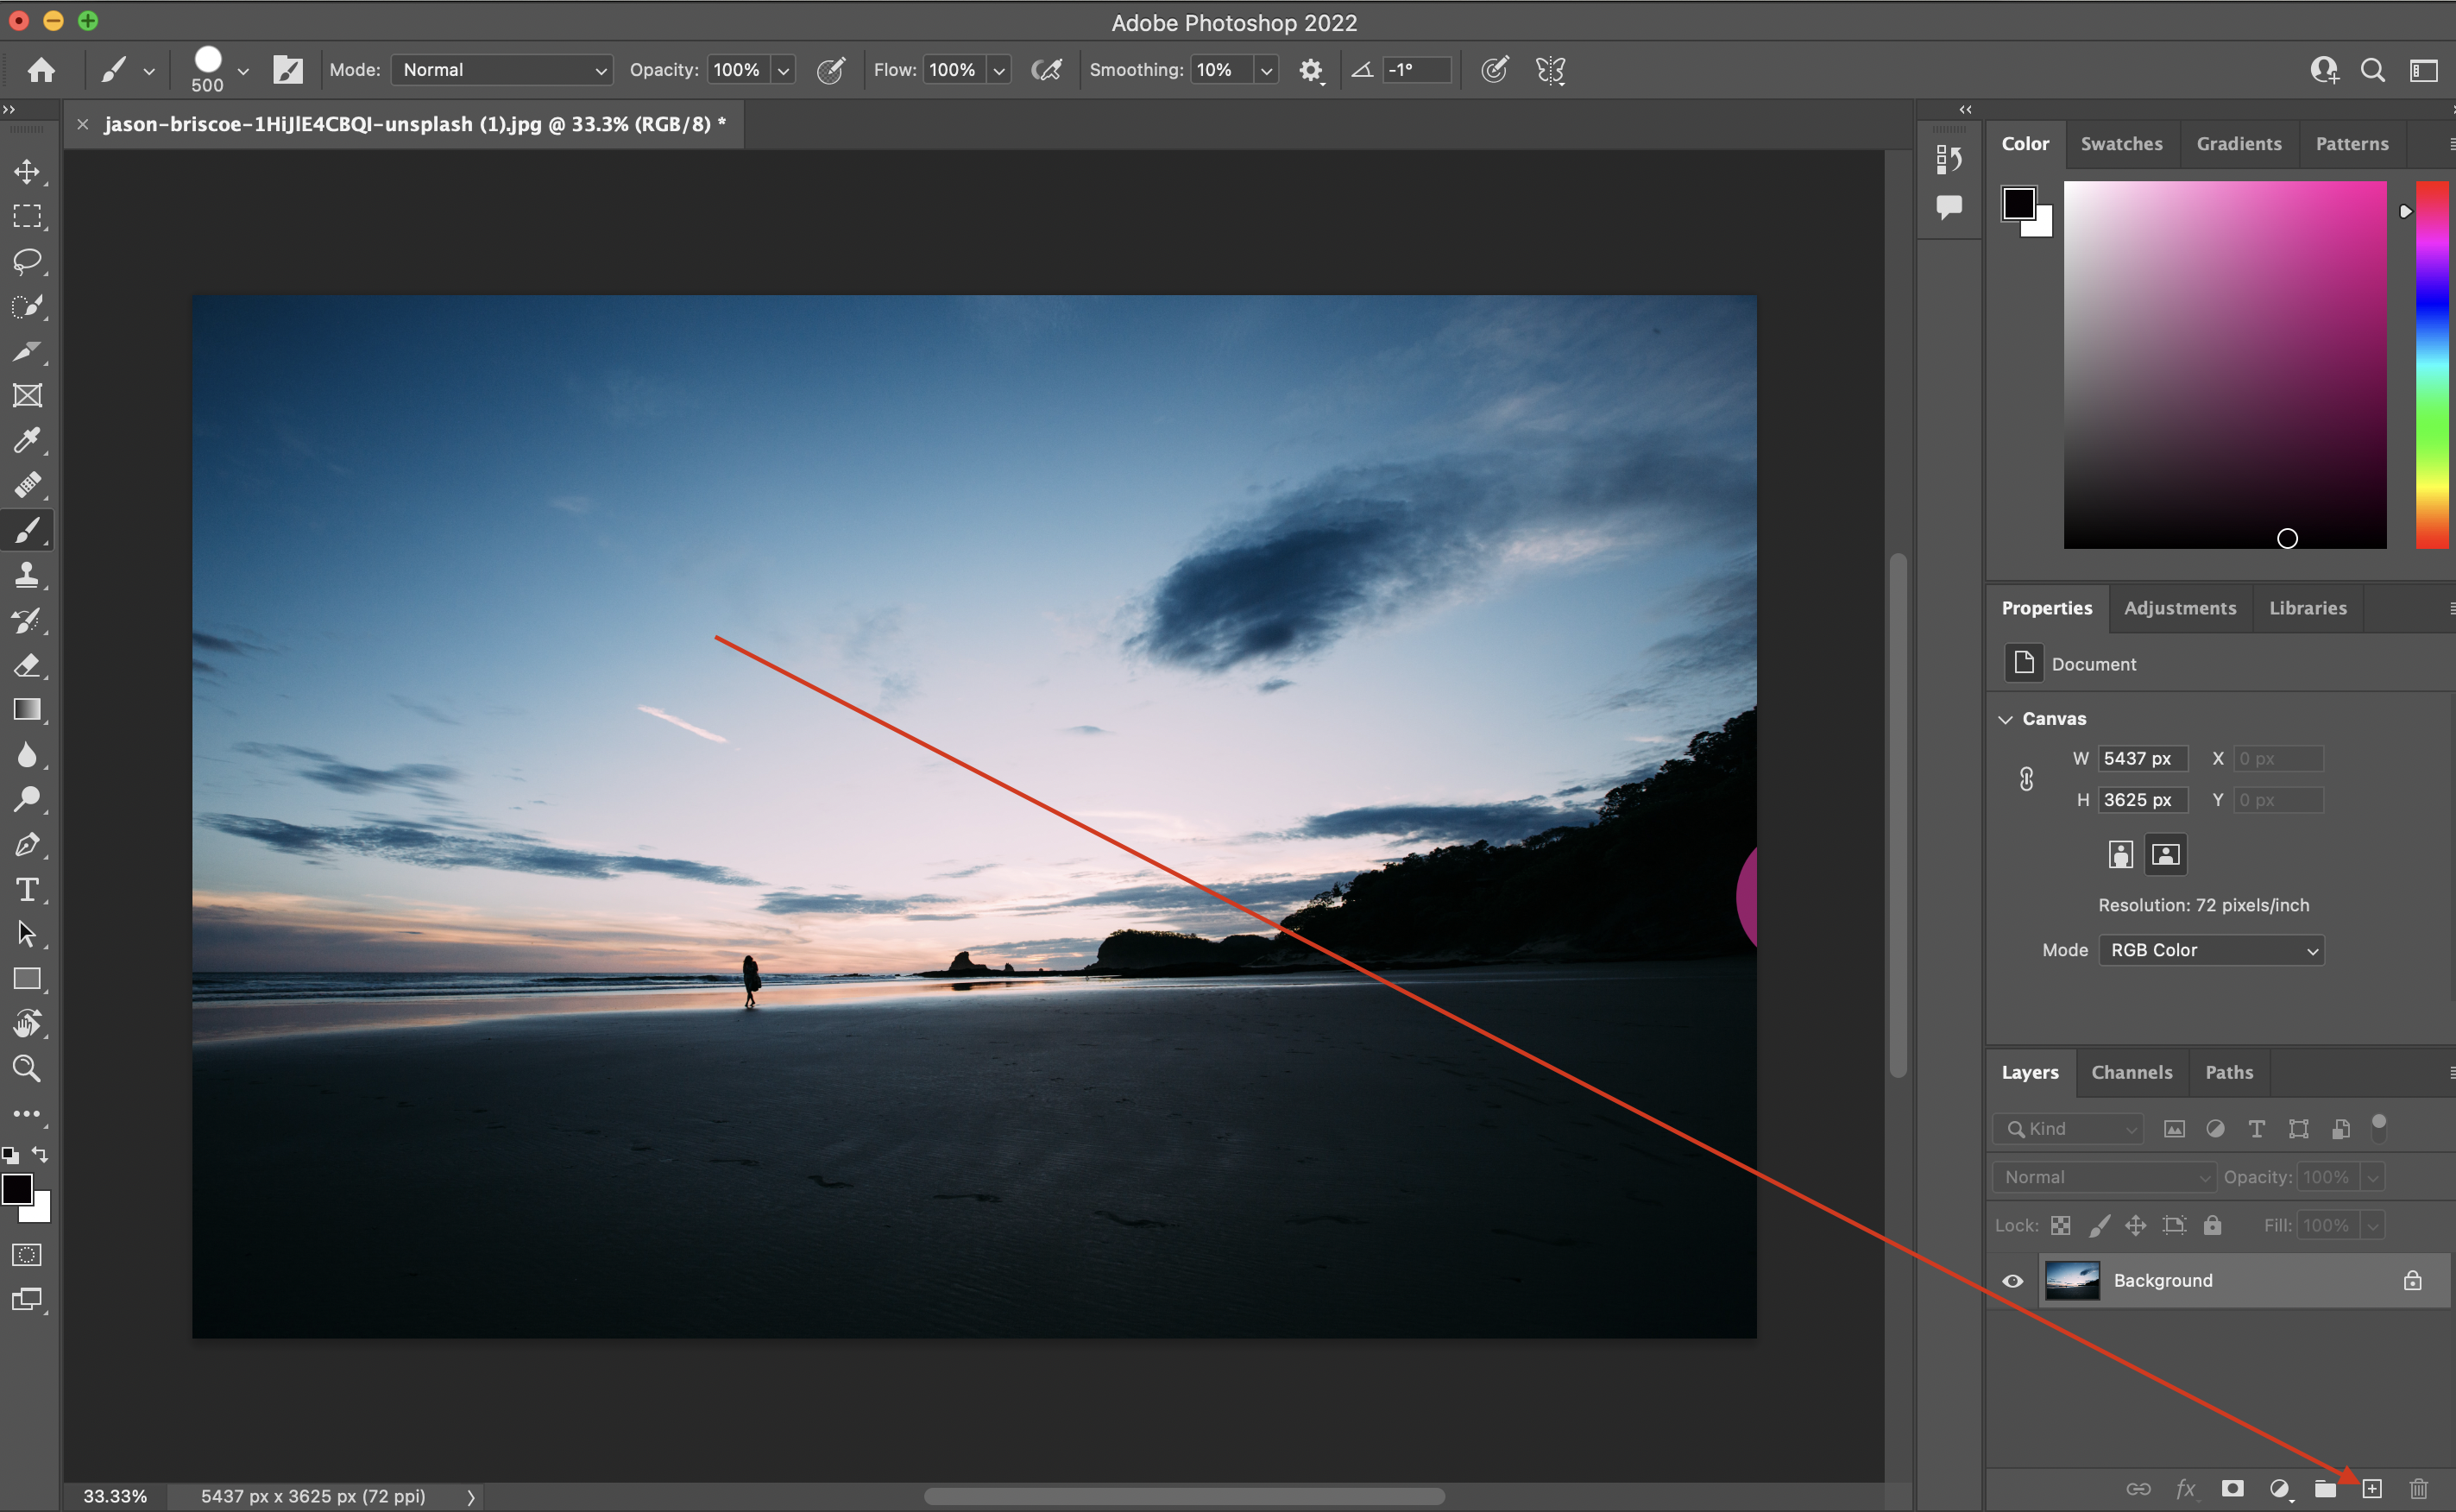
Clicking on the + icon on the lower right side of the screen will also create another layer.
To delete a Layer, select it in the Layers Panel and hit the Delete key on your keyboard.
Blend Opacity
The Blend Opacity used to change how two layers interact with each other. To change the blend mode, select the desired layer and go to Layer > Blending Options. There are many different modes to choose from, and you can experiment with layers to see which one gives you the desired effect.
Photoshop's five most commonly used blend modes are Multiply, Screen, Overlay, Color, and Luminosity. There are over 20 blend modes available in Adobe Photoshop but these you will likely use most often. The Multiply blend mode darkens, the Screen mode lightens images, the Overlay blend mode rases the contrast. The Color mode blends only the color of the selected layer, and Luminosity blends only the brightness.
The Opacity is used to control how much of the layer below it is visible. To change the opacity, select the desired Layer and go to Layer > Opacity. You can then enter a value between 0-100%.
The Fill is used to selectively change the opacity of a layer. You can select this tool at Edit > Fill. Once selected, you will choose what kind of fill you would like.
To create a gradient fill, go to Layer > New Adjustment Layer > Gradient. This will create a new gradient layer that you can then edit to your liking.
Editing photos: Filters and Effects with Adobe Photoshop
The Shadows/Highlights command
This Photoshop command allows you to adjust the shadows and highlights of an image. Select the layer you want to adjust and go to Image > Adjustments > Shadows/Highlights. You can then make the desired changes and hit OK.
The Levels command
This command allows Layers to adjust the dark and light tones of your image. To use it, select the layer you want to adjust and go to Image > Adjustments > Levels.
The Curves command
This command allows you to adjust the color and tone of your image. To use it, select the layer you want to adjust and go to Image > Adjustments > Curves.
The Hue/Saturation command
This one allows you to adjust your image’s hue, saturation, and lightness. To use it, select the layer you want to adjust and go to Image >Filestments > Hue/Saturation.
The Brightness/Contrast command
Finally, this allows you to adjust the brightness and contrast of your image. To use it, select the layer you want to adjust and go to Image > Adjustments > Brightness/Contrast.
Saving and Exporting your work on Adobe Photoshop
To save your work, go to File > Save As. This will open up a window where you can name your image and choose where you want it saved.
To export your work, go to File > Export. This opens up the same window that saving does; however, changes cannot be made when exporting.
What is the Best Way to learn Photoshop for beginners?
Courses offered by Adobe, such as their Photoshop Tutorial for Beginners course, can be a great way to learn the software. FMC offers in-depth Adobe Photoshop courses and tutorials. Many of these online tutorials can help teach you the basics of the program. There are many Photoshop tutorials on Youtube as well. Once you have learned the basics, practice makes perfect, so try out different techniques and experiment with the different tools Photoshop has to offer.
Learn How to Use Adobe Photoshop @ FMC
Adobe Photoshop is one of the most widely used photo editing programs in the world. Whether you're a beginner or advanced, Photoshop tutorials will give you the core skills you need to take your work to the next level.
In FMC's Photoshop Fundamentals, you will learn how to use Photoshop layer styles, how to change color levels, how to retouch and manipulate images, and much more.
Conclusion
Adobe Photoshop 2022 is a great place to begin if you are interested in image manipulation. You can create beautiful art pieces or make any image perfect for sharing on the internet. Either way, Photoshop has everything you need to start your journey into photo editing. That's it for this beginner Adobe Photoshop tutorial. Be sure to experiment with all of the different tools and commands to see what they can do. You never know what you might create.
For more Photoshop tutorials click here.
Whether you're a photographer, marketer, or designer, FMC's collection of basic to advanced Photoshop courses will give you the core skills you need to take your work to the next level.
More on Adobe Photoshop
- Creating Custom Graphics for Your Live Streams
- How to Get Rid of Anything in Photoshop with Dave Cross
- How to Create Gifs for Email and Social Media
- How to Create a Poster Using Only Photoshop!
- A Beginners Guide to getting started with Adobe Photoshop
- How to Blur Backgrounds with Photoshop in a Few Easy Steps

_300x300.jpg)
