Are you trying to break through the competitive world of streaming? Do you see other streamers with custom motion graphics in their live stream and wonder how they made those effects?
Valentina Vee, a director, editor, and Master Adobe trainer, taught a session during the Remote Production Conference where she explained how to import files from Photoshop, use After Effects to create motion graphics, and set up templates in After Effects to use in Premiere Pro for your stream!
Below are a few tips and tricks from her session on importing files from Photoshop, creating custom backgrounds with motion, and creating dual-camera templates with editable text boxes.
To see Valentia’s full session, purchase the recordings of the Remote Production Conference here.


Use Code: BLOG10 At Checkout To Save 10% off our Online After Effects Courses
Act Quickly, This Discount Won’t Last Forever!
How To Import Files from Photoshop
Oftentimes it is easier to design and layout your ideas in Adobe Photoshop; unfortunately, Photoshop is incapable of providing the same level of custom motion graphics and effects that Adobe After Effects is capable of. Photoshop (.psd) files can be imported to After Effects however and the process is quite simple.
First, ensure all of your layers are labeled and organized properly because After Effects will copy their names and placement when imported. Once that is done save your file simply as a Photoshop (.psd) file. Open Adobe After Effects and within your project window double click to import your .psd file. Make sure you import the .psd as “Composition - Retain Layer Sizes” instead of the default “Footage” so your layers stay separate, which allows you to edit and customize your graphics when imported into After Effects.

Lastly, while importing shapes or objects, these anchor points may shift. Select the Anchor Point Tool to move your Anchor Point to your desired location. Position the anchor point (looks like scope crosshairs with a circle). This allows you to easily adjust the size or shape of the objects moving forward.

Now you’re done! Your Photoshop file has successfully been imported into After Effects and you can begin working. In our example, the .psd file we imported was for a custom background graphic so we will be using that for the next section.
Creating a Custom Background with Motion

With our imported .psd file we can now start working on creating some stream elements! First, we want to create a custom background element for our stream with added motion.
For this example, we are creating a simple background featuring floating circles that will move dynamically of one another. To start we need to multiply the circles we have from the imported .psd.
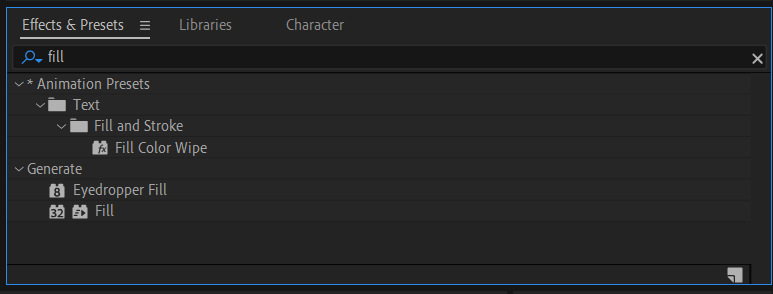
Simply copy the selected shape (in our example a circle) and paste them multiple times until you have your desired amount. If you would like the shapes to be different colors in the Effects search bar type “Fill” and select the colors you would like.

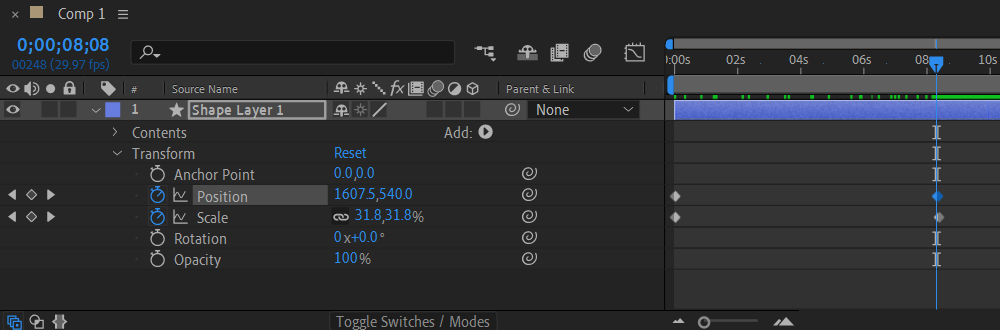
Now that you have multiple shapes we need to give them movement. To do this we are going to be using Keyframes. Keyframes are points on our timeline that set parameters for motions, effects, audio, and many other properties. Adding Keyframes is simple, select all your shapes and press the Position control shortcut key “P” by default. To then set the position of your Keyframes press the Stopwatch icon within your Render Queue.
This has now added a Keyframe to the very start of your sequence. In order to end the sequence (and give you the opportunity to loop this animation) go to the end of your sequence and press the “Add or Remove Keyframe” button located where the Stopwatch icon was originally.
You now have a sequence for each of your shapes but they have nothing to do at the moment. Select one of your shapes and click and drag it to your desired position. This should create a line showing you the path the shape will take during the sequence. Do this for each of your shapes.
If you scroll through you should see each of your shapes follow the path you dragged them on. This is a good start but each of the shapes is simply moving in one direction all at the same time. In order to make the shapes move in a more dynamic/organic fashion, we will need to add more Keyframes.
Select a shape in the middle of its movement and drag it in another direction. This has now added an additional Keyframe and will cause the shape to move in a different direction. Do this again as many times as you would like for each of your shapes. The shapes are still moving simultaneously however so to adjust the timings, click on the small white icons on your sequence timeline and move them. This will cause shapes to move independently of each other and your sequence will look much more dynamic.
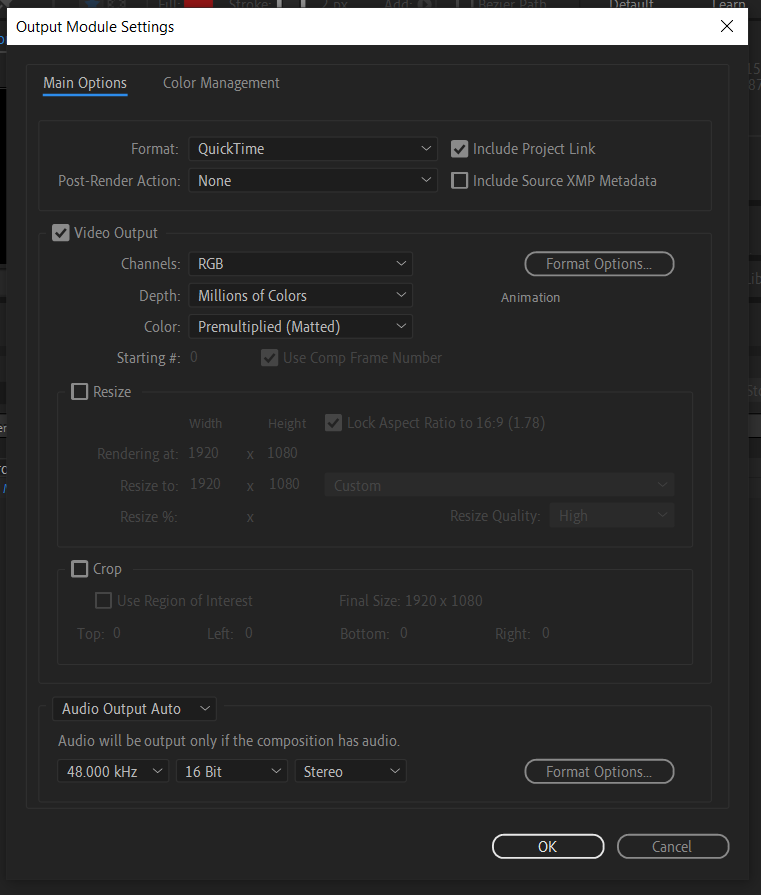
Your background is now finished! Now you can export it by going to the Composition tab and using the following settings:
- Add to Render Queue
- Change the Format to Quicktime
- Use Apple profile 422
Click the Render option and once it is finished the background is now ready to be used in OBS or your preferred scene software!
You now have a dynamic, animated background for your stream! This background can be added to various templates such as a dual-camera setup. Below we will continue our example of showing how to use the created background in a dual-camera environment with editable text boxes.
Dual Camera Templates with Editable Text
Following along with our example will now use the .psd file to mask the background for video sources and create a template that we can edit text on.
The .psd file we imported had two sections for video sources and text boxes beneath to label the sources. In order to use the previously created background with these two boxes for camera feeds/video sources, we will need to Key the boxes as well as mask the background. Doing this is very simple!
To key out the boxes, simply select the shapes that you wish to key out, go to the Effects search bar, and type Key. In our example, we only need the simplest form of keying so select “Linear Color Key” and drag that onto each of the shapes you want to key out.

Now simply take the eyedropper and select the color you wish to key out and click. Do that for each of the shapes you wish to key out; you should now have a transparent shape. Unfortunately, we do not want to see the background through the shapes so we are going to need to mask the background within our shapes.
Masking shapes is just as easy as keying them out. To begin, select your background layer. Draw rectangles (or your desired shape) around the areas in which you want to mask the background. You may have noticed that the default option is the opposite of what we are trying to accomplish. To reverse that, select the masks in your Render Queue and click on the “Add” dropdown; select subtract and the shapes you masked will now be masked properly!

We now have an animated background and two keyed and masked video source shapes. This is a very good beginner stream setup but what if you wanted to label the video sources with you and a guest’s name for example?
In order to create a template with editable text, we will need to follow some steps. First, add text to wherever you would like the text to be within your template. It should say something like “Text Here” or, like in our example, labeled to your specific needs such as “Host Name” and “Guest Name”.
Now, within the “Window” tab select “Essential Graphics Panel.” Here you will be able to save certain parts of your sequence with various editable parameters. Select the text that you wish to be editable and find the “Source Text” option within the Render Queue.
Select each of the source text options that you wish to be editable and drag them into the Essential Graphics Panel. Rename the source text labels to coincide with your project. Now in our example the text is located within boxes and depending on what is written within them, the boxes may need to be larger or smaller.
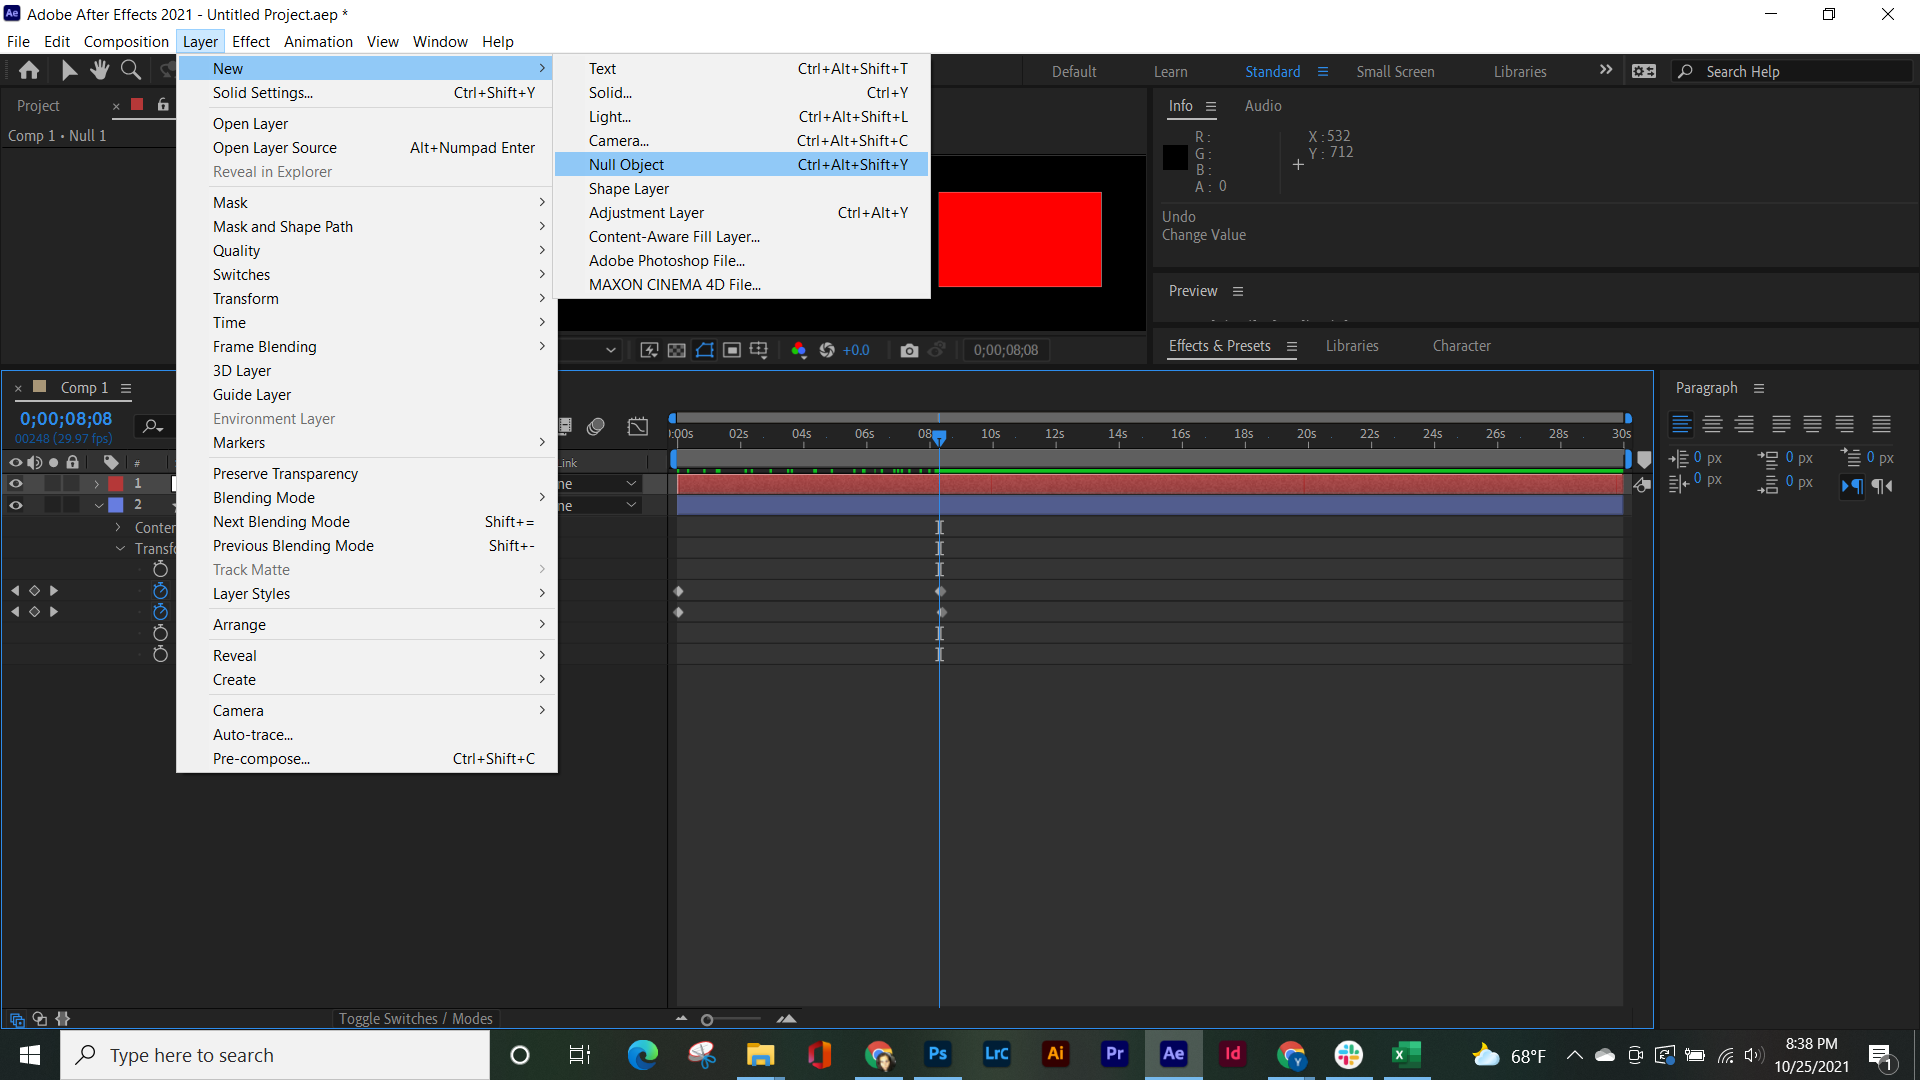
To allow text boxes to be editable within your template as well we will need a “Null Object”. “Null Objects” are created by going within the Layer tab, selecting the “New” submenu, and clicking “Null Object”.
Rename your new Null Object to something similar to “textbox control” just to help you keep track. In order for this Null Object to resize your text boxes, we will need to add an effect to it. Go to the Effects search bar again and type “slider”. Click and drag the “slider” effect as many times as you need (it is a one to one per text box). Open your Null Object within your Render Sequence and rename each of the Slider controls to coincide with the various text boxes they are going to be resizing.

Now go and select each of the textboxes themselves and press the Scale shortcut “S”. Click on the Null Object you just created and lock it to the top of your window by pressing the small lock on the top left.

Now use the Pick Whip Tool (the swirl icon from when we were making the background) and link each of the text boxes to their corresponding Slider within the Null object. Open up the Scale option within your Render Queue and you should see some code.

Within this code, you should see (temp, temp). This corresponds to the size of your textbox so in order to make it the correct size and editable we need to change this. Refer back to the original .psd if you have to but find the size of the text boxes you are trying to make and change the settings from (temp, temp) to, in our example, (100, 100) to (100+temp, 100). This will allow the width of the textbox to change but keep the height a locked number. Do this for all of your text boxes/sliders. Once you are done move each of your Sliders into the “Essential Graphics” window. If you want to have your text boxes be able to get smaller as well as larger simply adjust the scale settings to have the first number be negative and the other be positive like -50,50.
We now have a fully customizable template for custom motion graphics!
In order to use it within Premiere Pro simply click “Export Motion Graphics Template” within the “Essential Graphics” window and save it to your Local Library. Then open Premiere Pro, open the Essential Graphics window there, Browse and you should see your new Template there.
Valentina Vee explained some top tips for beginner streamers to take your stream quality to the next level. By simply adding some animated backgrounds and having a dual camera template you can improve your stream quality and hopefully gain increased viewership!
This was just a taste of the steps Valentina Vee went over in her “Creating Custom Graphics for Your Streams” session during the Remote Production Conference.
If you wish to see her entire session along with countless others purchase the recording bundle from the Remote Production Conference site here.

_300x300.jpg "Custom motion graphics")