
Sometimes you just need to know some quick basics that can help you promote and /or enhance your expertise! I hear this a lot from video producers, marketing professionals, and web developers (to name just a few) who are producing great work, and who think they could do more to highlight it on platforms like social media. If you are a creative professional, you likely have access to Adobe Creative Cloud applications beyond those that you are using on a regular basis. Take for instance Adobe InDesign—one of the most powerful Adobe applications! Most of the video artists that I know have never even opened Adobe InDesign.
If you fall in this category, this blog post is for you. Keep reading and you will learn some quick basics that will take you a long way. By the end of this post, you will know how to use Adobe InDesign to quickly create compelling graphics for social media!
Before we start, you are probably wondering why Adobe InDesign, when you can create graphics in other programs such as Photoshop. Getting familiar with Adobe InDesign will help you create more than just images. This is just the beginning. You can then branch out to create blogs, eBooks, and premi much more.
Adobe InDesign is powerful, and once you get started, I know that you will continue to use it for proposals, reports, and a myriad of other documents.
Use Code: BLOG10 At Checkout To Save 10% off our Online Adobe InDesign Courses
Table of Contents
- Getting Started in InDesign
- Choosing a Template
- Back in InDesign
- Customizing the Text
- Replacing the Picture and Logos
- Final Touches
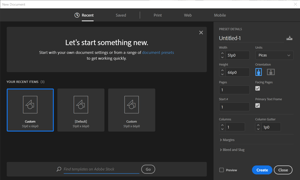 Getting Started in InDesign
When first opening InDesign, you will be prompted with options to create a new document. If you have never opened Adobe InDesign before, this window can be overwhelming. My suggestion is to start with one of the free templates that Adobe offers in Adobe Stock. At the bottom of the panel, you’ll find a search bar that you can use to find exactly what you are looking for.
Choosing a Template 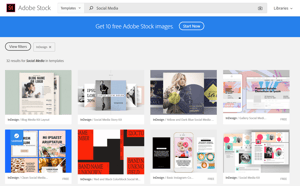
Let’s say you need ideas for social media visuals: simply type “social media,” and click “go.” This will take you to the Adobe Stock website where you will see template options. Some of them are premium and others are free (clearly marked with the words “FREE” at the bottom of the template). Proceed with obtaining the license for the one you choose and then open it in Adobe InDesign.
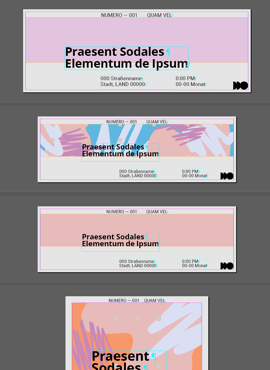 Back in InDesign
If you are missing some of the fonts used in the template, you may see a message from Creative Cloud. Activate the fonts and then you will be ready to work on your template! Initially, you will see the first page of the template. You can zoom in and out to see more or less of the page(s) available to you:
CTRL+ OR CTRL– → on Windows |COMMAND+ OR COMMAND– → on the Mac
Now, you should change your workspace so that you can easily have access to the panels that will help you edit your page. This is accomplished in the same way in most Adobe programs:
Window → Workspace → Advance to choose the Advanced Workspace.
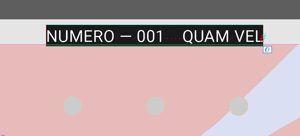 Customizing the Text
You can now add your own copy and replace the template images with your own. Sometimes, depending on the template, you may notice that some text cannot be edited directly on the pages. That means the text is part of the master page. To make the text directly editable on the page, press and hold SHIFT and CONTROL (SHIFT and COMMAND on the Mac), and double click on the text using the selection tool (black arrow). This will allow you to select the text and to edit it.
 Replacing the Picture and Logos
You can click on the picture with the selection tool until you see an outline with control points on the picture or graphic. You can now delete it by pressing the DELETE key on your keyboard. Delete anything else on the page that you don’t want. If you cannot select it, press and hold SHIFT and CONTROL (SHIFT and COMMAND on the Mac), and double click on the item using the selection tool. Just like the text, this makes the images/graphics directly editable on the page.
To add the image(s) that you need, go to File → Place and choose your file. You can now click and drag to make a rectangle that will determine where the picture goes.
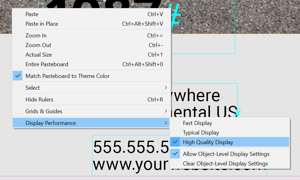
Once you have the picture in your document, you can resize it, move it, rotate it etc. By default, the display of the picture will be low quality. You can change this by right-clicking on the picture and choosing Display Performance → High Quality Display.
 Final Touches
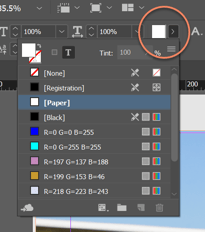
Once you are happy with your graphics and pictures, make sure the text is readable over the image(s) you just added. If further adjustments are needed, you can adjust the color of the text in the Text Color Panel at the top of the screen.
If changing the color of the font is not enough, consider adjusting the background. For instance, you can add a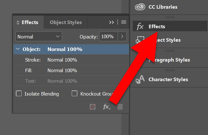 semi-transparent background. To do so, go to the Effects Panel (on the right side of your screen) and change the Fill to a transparency % that works for your graphic.
Final Graphic
To preview your design, click somewhere in the gray canvas area to deselect everything and then press SHIFT W and the screen will turn into a display of your work. To exit this view, press SHIFT W again.
All you need to do now is export this image, or print it out. Go to File → Export and choose the type of file to export (e.g. JPG).
A new panel will open for you to choose exactly what you want to export and that’s it! Give it a name, assign a location, and you are done!

Adobe Certifications & Prep Courses
Are you looking to get Adobe Certified?
FMC Training is the leading provider of Adobe certification exams. We’ve helped thousands of people just like you pass their certification exam and land that dream job. Our training material is written and recorded by industry experts who know what it takes to succeed in today's competitive market.
Learn More About Adobe InDesign
Get a jump in your creative career and Learn Adobe InDesign online, Adobe's powerful video editing software.
Learn how to make a Square in Adobe InDesign.
Subscribe to our YouTube channel for more Adobe InDesign tips and tricks!


_300x300.jpg)
