Overview
The question has been asked on how to make a pizza. In the kitchen, I have my
grandmother’s recipe which is quite delicious. In Illustrator, we can also make a
pretty nice pizza. Here are some simple steps to do so for both… bon appetit!
Steps
1. USE THE POLAR GRID TOOL
Click and Drag
I usually find it easier to click and drag the solution visually rather than doing
math. I will use modifiers to help me shape the object. Just remember to always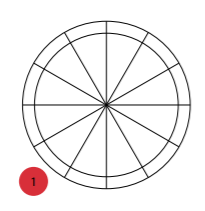
get the object altered as needed with the modifiers before letting go of the mouse.
Once released, parts of the shape are baked in.
- Select the Polar Grid.
- Click and drag to draw the shape. (Do not let go until the grid is drawn.)
- Hold the shift key to constrain to a circle
- Use the up arrow to add Radial Dividers until you have the number you want.
- Use the down arrow to subtract Concentric Dividers until there is only 1 inside divider.
- Let go of your mouse then let go of your modifiers. (The item may not be constrained if done in the wrong order)
Using a dialog box
Sometimes if you know the exact sizing of an object, it is just easier to type in the
properties then trying to build the shape while drawing.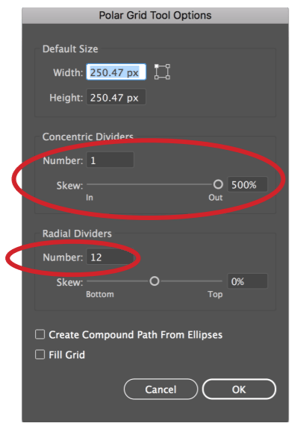
- Select the Polar Grid.
- Click one time on the artboard to bring up the dialog box for the Polar Grid object.
- Width & Height will be the same value that is needed for your artwork.
- The Concentric Dividers: Number=1, Skew=500%
- The Radial Dividers: Number=0, Skew=0%.
- Click on OK.
2. GET READY TO DIVIDE
Why Scale?
We are scaling up the radial lines so that they will intersect the concentric circles.
The line has to intersect the circle in order to get the Divide in the Pathfinder to
work correctly.
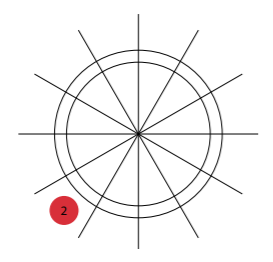
- Ungroup the grid with Object> Ungroup (Shift+Command+G/ Shift+Control+G). There will be two groups within the original group: the concentric circles and the radial lines.
- Choose the lines group and scale up. Just double-click on the scale tool to get the scale dialog box. Scale up uniform and make sure the scale is above 100%. (My value is overkill at 150%).
3. DIVIDE
Old Pathfinder Tools
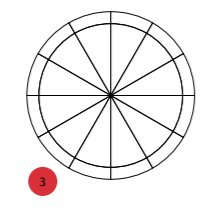
My favorite tools in the Pathfinder are the new Shape Modes, but sometimes we
need the oldies but goodies!
In this case we need the Radial lines to be used to divide the two circles into shapes. The Divide option will do just that.
- Select the grid (both groups) and choose Divide from the Pathfinder panel
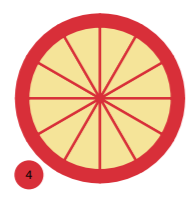
4. COLOR
Find you colors
If you do not see colors you like, try using your Swatches Library. This is found on
the bottom left of the swatch panel or Window> Swatch Libraries> choose
the color library.
Foods> Vegetables may be a good choice for this exercise.
- Ungroup your object.
- Select and color as needed. I chose all the paths: Select> All (Command+A/ Control+A). Next, I made sure they had the same stroke. I then filled them for the outside crust.
- Deselect all: Select> Deselect (Shift+Command+A/ Shift+Control+A)
- Then view the outline: View> Outline (Command+Y/ Control+Y). This is where you can create a bounding box around the inner slices. When creating a bounding box, make sure you click down where there is no line and drag around only on parts of the paths you want to select.
- Choose a new color for the fill of the inside slices.
- Deselect all.
- View in preview: View> Preview (Command+Y/ Control+Y).
5. ADD PEPPERONI
Add a circle
Add other ingredients on the pizza. In this case I added pepperoni. If you need
a more intricate piece of artwork like broccoli then create the artwork. Make a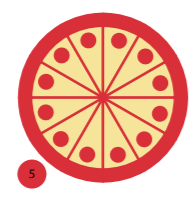 symbol out of it and use the symbol for the following steps.
- Create a circle on one slice. Position and size it as necessary.
- With the Rotation tool selected click on the center of the pizza to move the anchor point to that center location.
- Clicked and drag the pepperoni while holding the Option/Alt key. Once in the new position, let go of the mouse then let go of the modifier. Do not deselect the pepperoni.
- Use Object> Transform> Transform Again (Command +D/ Control+D) to create a copy with the same rotation value. Do this until you have a pepperoni on every slice.
6. DONE!
Bon Appetit
I choose to pull out a slice in the end. You can also decide to group each crust
with the inside part of the pizza slice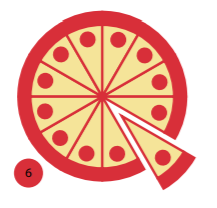
After creating an illustrated pizza pie, try your hand at creating a homemade pie! Here is my gram's recipe.
Gram’s Pizza
THE DOUGH
Ingredients
- 2 cups of water
- 2 tablespoons of sugar
- 2 tablespoons of olive oil
- 1 teaspoon of salt
- 1 package of yeast (2 if in a rush)
- 3.5 - 4 cups of flour
Dissolve Together
- 1 cup of boiling water
- 2 tablespoons of sugar
- 2 tablespoons of olive oil
- 1 teaspoon of salt
Add
Add 1 cup of cold water. This will cool the mixture. Add the yeast. (1-2 packages).
Make sure the mixture is lukewarm prior to adding the yeast.
Once the yeast rises add the flour. Mix well. If it is too sticky, add a little more
flour. It should hold together well and not stick to the bowl.
Rise
Let it rise to double the size. (This may take an hour or more depending on the
warmth of the room.) Once it is risen you should be able to handle it with ease. If
sticky, be sure to flour the board well. Roll out into pies
THE TOPPINGS
Ingredients
Add topping and a few of your own too!
- Fresh mozzarella
- Fresh tomatoes
- Fresh basil
- Olive Oil
BAKE
400º
Bake 20-30 minutes until brown.

_300x300.jpg "Conference-Recordings-(General)_300x300")